How to Achieve the "Moving Checkers" Effect
Step 1 – Silver Basecoat
Hot Dog covers the snowboard in a mix of Ditzler® Big Flake™ Mini Silver VM4421 and Vibrance Collection® Midcoat VWM500. After drying, he applies VC5700 Ditzler® Custom Clear and sands until the snowboard is smooth.
Step 2 - Center and Edge Taping
Finlan then tapes around the edges of the board. He also masks the center, in effect dividing the area into two panels. "Moving Checkers looks better when broken up," he says.
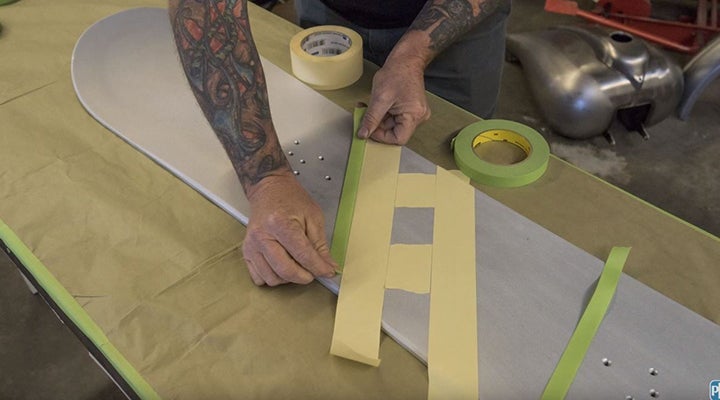
Step 3 – First Taping
He places the first stripe down the center and works toward the sides. He uses 3/4-inch tape with a 3/4-inch gap in between stripes. You can choose a different tape width depending on the size of your project.
Step 4 – First Blue Layer
Setting his gun for a one or two inch pattern, Hot Dog sprays a custom mix of Radiance® II Blue (Green Shade) DMX216 and VWM500 Custom Midcoat. The blue lines are spaced to fade gently into each other
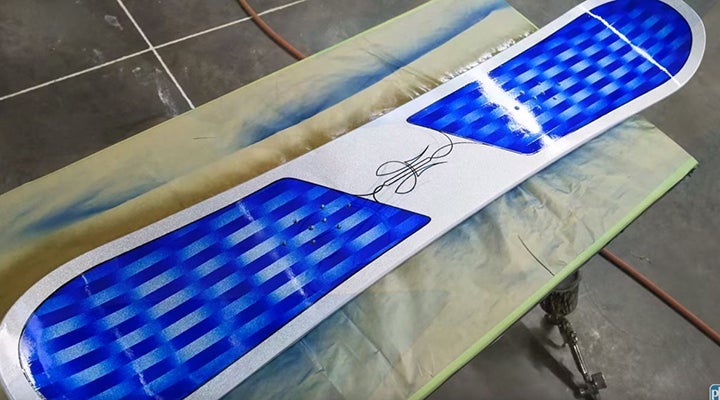
Step 5 – Remove Tape
As you can see, the design is already taking on its trademark trickiness. "Photos don't do it justice. It's really cool to look at," Hot Dog says.
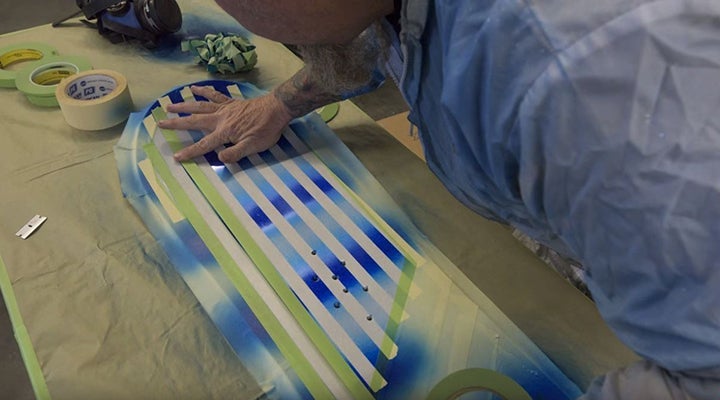
Step 6 – Second Taping
Tape is used to mask off the blue he just sprayed. This leaves white gutters the length of each panel.
Step 7 – Second Blue Layer
Hot Dog adds more blue across the board. "You spray between the other lines with the same faded edge on it." It's the overlapping of these fogged layers that builds the restless effect.
Step 8 – Edge Fogging
After removing the tape, Hot Dog fogs the edge of each checkerboard to reinforce the panel's border. This also directs the viewer's eye toward the center of the pattern.
Step 9 – Clear and Pinstriping
After clearing the board, Hot Dog adds pinstriping around the panels with 1 Shot® 199L Lettering Black. He also adds his signature freestyle pinstriping to the silver center area.